Building and Maintaining a Worm Farm: A Beginner’s Guide to Composting with Organic Household Waste
Creating a worm farm is a sustainable and efficient way to turn organic household waste into nutrient rich compost. Building and maintaining a worm farm helps reduce waste, improves soil health, and gives you an endless supply of compost for your garden. This guide will walk you through the essentials of setting up, managing, and reaping the rewards of your worm farm.
Step 1: Choosing the Right Worm Farm Setup
The right worm farm setup will make a difference in how effectively it breaks down waste and produces compost.
- Decide between a multi-layered worm farm or a single-level container based on space and composting needs.
- Place the worm farm in a shady, cool area with good air circulation.
Tips
- Look for worm farm kits if you’re new; they come with instructions and essential components.
- Avoid placing the worm farm in direct sunlight to keep the worms from overheating.
Sketch a spot in your yard or balcony where you’d place your worm farm.

Step 2: Selecting and Adding Worms
Composting worms, like red wigglers also known as tiger worms, are best suited for a worm farm because they consume large amounts of organic matter.
- Buy worms from a local garden center or worm supplier.
- Add bedding material like shredded newspaper or coconut coir to the bottom of the worm farm, then introduce the worms gently.
Tips
- Start with at least 500 grams of worms, as they’ll multiply quickly under the right conditions.
- Avoid using soil as bedding; it can suffocate the worms.
Research the best local suppliers of composting worms in your area.

Step 3: Feeding Your Worms
Feeding the worms correctly is key to building and maintaining a worm farm that thrives. Organic food scraps make the best food for worms.
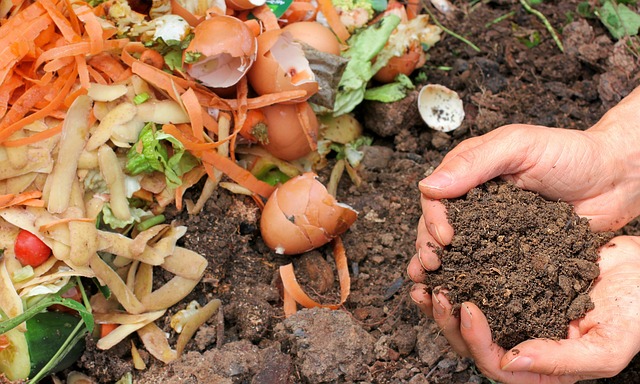
- Feed them small amounts of fruit and vegetable scraps, eggshells, coffee grounds, and paper.
- Avoid meats, dairy, oils, and citrus peels, as these can harm the worms.
Tips
- Chop up food scraps into small pieces to make them easier for worms to consume.
- Cover food scraps with bedding to reduce odors and deter pests.
List the types of kitchen waste you produce and categorize which can go into the worm farm.

Step 4: Maintaining Your Worm Farm
Proper maintenance keeps your worm farm productive and your worms healthy.
- Keep the worm farm moist but not wet by spraying it with water as needed.
- Stir the top layer gently every few weeks to aerate the compost and encourage decomposition.
Tips
- If the farm starts smelling, it’s likely too wet or too much food was added. Remove some food or bedding and allow it to dry slightly.
- Check for signs of pests and address them by adjusting moisture or adding more bedding.
Set a reminder to check moisture levels in your worm farm weekly.

Common Errors and Misconceptions in Worm Farming
Understanding common mistakes helps keep your worm farm running smoothly.
#1: Overfeeding the worms
Start with small amounts and gradually increase as the worms multiply.
#2: Improper moisture levels
Too dry or too wet conditions can disrupt composting. Regularly monitor the moisture and adjust as needed.
#3: Using the wrong worms
Garden earthworms are not suited for worm farms; always use composting worms.
One reader shared that initially overfeeding their worms led to mold growth. Cutting back on food and stirring the compost restored balance!

Reaping the Benefits of Your Worm Farm
Building and maintaining a worm farm is a rewarding and eco-friendly way to handle kitchen waste. With a little effort and care, you’ll soon be producing rich compost for your garden. Embrace this sustainable hobby and enjoy the positive impact on your plants and the environment.
Additional Resources for Aspiring Worm Farmers
1. Books
- “Worms Eat My Garbage” by Mary Appelhof
- “The Worm Book” by Loren Nancarrow and Janet Hogan Taylor
2. Websites
- Worm Farming Secrets (www.wormfarmingsecrets.com)
- Aussie Worm Power (www.aussiewormpower.com.au)